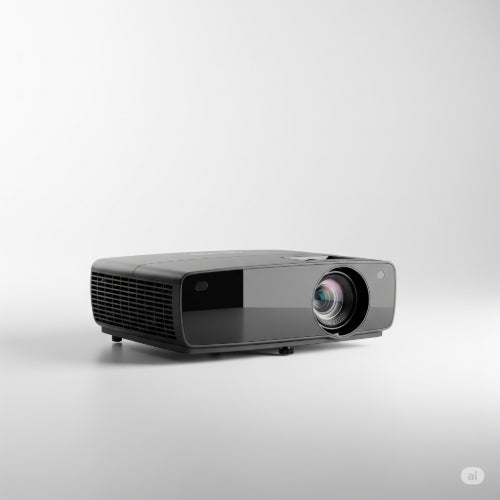
Bringing Your Vision into Focus: How to Troubleshoot a Projector for Clearer Displays
A projector is an invaluable tool, transforming small screens into large, impactful visuals for presentations, movies, or even a casual gaming session. But when your brilliant projection turns into a blurry mess, a faded image, or simply refuses to display at all, it can quickly derail your plans.
Don't let a fuzzy display dim your enthusiasm. Many common projector issues are surprisingly easy to fix with a systematic troubleshooting approach. This guide will help you diagnose and resolve problems to get your projector delivering crystal-clear images once more.
1. The Basics: Power, Connections, and Physical Checks
Always start with the simplest things. Many display problems stem from easily overlooked fundamentals.
-
Is the Projector Powered On?
-
Check: Look for power indicator lights on the projector. Is it in standby mode?
-
Fix: Ensure the power cable is securely plugged into both the projector and a working outlet. Press the power button to fully turn it on, not just wake from standby.
-
-
Source Device On and Outputting?
-
Check: Is the laptop, Blu-ray player, or other source device powered on and set to output video?
-
Fix: Turn on the source device. Confirm its display settings are configured to extend or duplicate the screen (often done via function keys like Fn+F7 or Fn+F8 on laptops).
-
-
Cable Integrity and Connection:
-
Check: Is the video cable (HDMI, VGA, DisplayPort, USB-C) securely connected to both the projector's input and the source device's output? Is the cable damaged or kinked?
-
Fix: Unplug and firmly re-seat both ends of the video cable. Try a different cable if you have one available, especially for HDMI, as some cables can degrade over time.
-
-
Input Source Selection:
-
Check: Does the projector know which input to display? Many projectors have multiple input ports.
-
Fix: Use the projector's remote control or on-device buttons to cycle through the input sources (e.g., HDMI 1, HDMI 2, VGA, PC, etc.) until you see your content.
-
2. Focusing on Clarity: Blurry or Faded Images
Once you have an image, even if it's poor, you can work on refining it.
-
Focus Ring Adjustment:
-
Check: Is the image blurry, but you can see content?
-
Fix: Locate the focus ring on the projector lens (often a rotating ring or a slider). Slowly adjust it until the image appears sharp.
-
-
Keystone Correction:
-
Check: Is the image wider at the top than the bottom, or vice-versa, making it look trapezoidal? This happens when the projector isn't perfectly perpendicular to the screen.
-
Fix: Use the projector's keystone correction feature (often a button on the remote marked "Keystone" or an option in the menu). This digitally squares off the image. Caution: Digital keystone correction can slightly reduce image quality, so it's best to physically adjust the projector's tilt if possible.
-
-
Projector Placement and Distance:
-
Check: Is the projector too close or too far from the screen/wall, exceeding its optimal projection distance?
-
Fix: Consult your projector's manual for its throw distance specifications. Adjust the projector's position to match the desired screen size within its optimal range. Use the zoom ring on the lens (if available) to fine-tune the image size.
-
-
Lens Cleanliness:
-
Check: Is the lens dusty, smudged, or foggy?
-
Fix: Gently clean the projector lens with a microfiber cloth specifically designed for optics or a lens cleaning solution. Avoid harsh chemicals or abrasive materials.
-
3. Color, Brightness, and Image Quality Issues
When the image is there, but it just doesn't look right.
-
Brightness/Contrast Settings:
-
Check: Is the image too dark, too bright, or washed out?
-
Fix: Access the projector's on-screen display (OSD) menu using the remote and adjust brightness, contrast, and color settings. Some projectors have preset modes (e.g., "Presentation," "Cinema," "Dynamic") that can quickly improve the image.
-
-
Lamp Life/Lamp Issues:
-
Check: Is the image significantly dimmer than it used to be? Are there any "lamp" indicator lights or warnings on the projector? Projector lamps have a finite lifespan.
-
Fix: If the lamp is nearing its end-of-life or has failed, it will need to be replaced. Consult your manual for the lamp replacement procedure and ensure you use an official replacement lamp to avoid damage or poor performance.
-
-
Dust Blobs / Dead Pixels:
-
Check: Do you see dark spots or colored pixels that are always present on the projected image, regardless of the source?
-
Fix: Dust can sometimes get inside the optical engine. For external dust, gentle cleaning (as above) may help. For internal dust or dead pixels, professional servicing might be required.
-
-
Aspect Ratio Mismatch:
-
Check: Does the image look stretched or squished?
-
Fix: In the projector's OSD menu, check the aspect ratio setting (e.g., 16:9 for widescreen, 4:3 for standard). Ensure it matches the aspect ratio of your source content.
-
4. Advanced Diagnostics
If basic steps don't resolve the issue, consider these:
-
Test with a Different Source Device: Plug in a different laptop or video player to see if the problem persists. This helps determine if the issue is with the projector or the source device.
-
Test with a Different Cable Type: If using HDMI, try VGA, or vice-versa, if available on both devices.
-
Factory Reset: As a last resort, performing a factory reset on the projector (via its OSD menu) can revert all settings to default, clearing any software glitches. Note: You'll have to reconfigure everything.
-
Firmware Update: Check the projector manufacturer's website for firmware updates. These can sometimes resolve known display issues or improve compatibility.
By methodically working through these troubleshooting steps, you'll likely pinpoint the cause of your projector's display woes and get back to enjoying clear, vibrant projections in no time.