Building Your Office's Network Backbone: How to Set Up a Network Switch
In today's connected office, a reliable and efficient network isn't just a luxury – it's a necessity. From sharing files and accessing cloud applications to powering VoIP phones and connecting printers, everything hinges on your network infrastructure. At the heart of this infrastructure often sits a critical piece of hardware: the network switch.
If you're looking to expand your office network, improve performance, or simply understand how to connect your devices, setting up a network switch is a fundamental skill. Don't be intimidated; it's more straightforward than you might think!
What is a Network Switch and Why Do You Need One?
Think of a network switch as the traffic controller of your office's local area network (LAN). Unlike an old-fashioned hub (which simply broadcasts data to all connected devices), a switch intelligently directs data packets only to their intended destination. This efficiency reduces network congestion, boosts performance, and enhances security.
You'll need a network switch if you have:
- More wired devices than your router has ports: Most routers have only 4-5 LAN ports. A switch instantly expands your wired connectivity.
- Performance demands: For applications requiring high bandwidth (like large file transfers, video conferencing, or multiple simultaneous users), a switch provides dedicated bandwidth to each connected device.
- Segmenting your network: Managed switches allow you to create Virtual Local Area Networks (VLANs) for better organization, security, and performance.
- Power over Ethernet (PoE) devices: If you use VoIP phones, wireless access points, or IP cameras, a PoE switch can deliver both data and power over a single Ethernet cable.
Choosing the Right Network Switch for Your Office
Before you plug anything in, select the right switch for your needs:
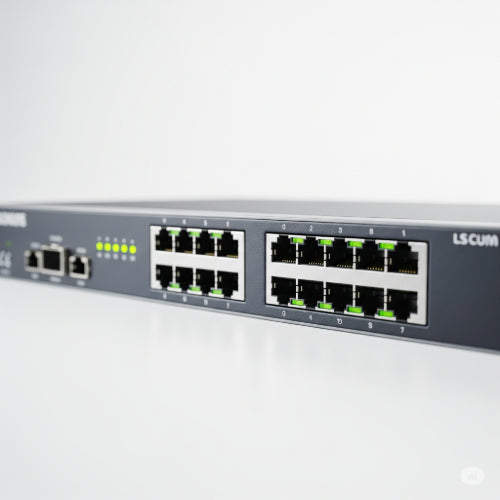
- Number of Ports: Switches come with varying numbers of ports (e.g., 5, 8, 16, 24, 48). Count how many wired devices you have now and add a few extra for future growth.
-
Speed (Gigabit Ethernet is Standard):
- 10/100 Mbps (Fast Ethernet): Generally too slow for modern office demands. Avoid unless connecting very old, low-bandwidth devices.
- 1000 Mbps (Gigabit Ethernet / 1GbE): This is the current standard for most office networks. It provides excellent performance for file sharing and internet access.
- 10 Gigabit Ethernet (10GbE): For very high-bandwidth needs, like connecting servers, network-attached storage (NAS), or backbone connections. More expensive but offers superior speed.
-
Managed vs. Unmanaged:
- Unmanaged Switches: "Plug-and-play" devices. They simply expand your network with no configuration required. Ideal for small offices or extending a home network.
- Managed Switches: Offer advanced features like VLANs, Quality of Service (QoS), port mirroring, and security controls. They require configuration via a web interface or command-line interface (CLI). Best for growing businesses, those with specific security needs, or complex network requirements.
- PoE (Power over Ethernet): If you have devices that can be powered via Ethernet (IP cameras, VoIP phones, Wi-Fi access points), a PoE switch simplifies cabling by delivering power and data over one cable. Ensure the switch provides enough PoE power (total wattage budget) for all your devices.
-
Form Factor:
- Desktop: Small, fanless, designed for placement on a desk. Good for very small offices.
- Rack-Mountable: Designed to fit into a standard 19-inch server rack, often with integrated cooling fans. Best for organized server rooms or network closets.
How to Install and Set Up Your Network Switch
Basic Installation (Unmanaged Switch):
-
Unpack and Place: Find a suitable location for your switch. It should be:
- In a cool, dry, well-ventilated area.
- Away from direct sunlight or heat sources.
- Securely placed on a flat surface or mounted in a rack (if rack-mountable).
- Close enough to your router/modem and devices to keep cable runs manageable.
- Connect to Power: Plug the switch's power adapter into an electrical outlet. It's highly recommended to connect it to an Uninterruptible Power Supply (UPS) to protect against power fluctuations and outages.
- Connect to Your Router/Existing Network: Take an Ethernet cable and connect one end to any available LAN port on your primary router (or existing network switch). Connect the other end to any standard port on your new switch. This creates the uplink to your internet connection and existing network.
- Connect Your Devices: Now, take Ethernet cables from your computers, printers, VoIP phones, and other wired devices and plug them into the remaining available ports on your new switch.
- Verify Connectivity: Once everything is plugged in, check the LED indicator lights on the switch ports. A solid green or amber light usually indicates a successful connection, and blinking lights show data activity. Test internet access and network resources from connected devices.
Basic Setup for Managed Switches:
For a managed switch, the physical installation is the same, but you'll have an additional configuration step:
- Initial Connection: Connect your computer directly to one of the switch's ports (or via another network device if the switch is already uplinked).
- Access the Management Interface: Most managed switches have a default IP address (e.g., 192.168.1.254 or 192.168.0.1). Open a web browser on your connected computer and enter this IP address. You'll be prompted for a username and password (check the switch's manual for defaults).
- Change Default Credentials: Immediately change the default username and password for security reasons.
- Configure IP Address: Assign a static IP address to the switch that is within your network's subnet but outside your router's DHCP range. This makes it easy to access the management interface later.
- Firmware Update: Check the manufacturer's website for any available firmware updates and install them to ensure optimal performance and security.
-
Basic Configurations (Optional but Recommended):
- VLANs (Virtual Local Area Networks): If you want to segment your network (e.g., separate guest Wi-Fi from employee network, or VoIP phones from data), create VLANs.
- QoS (Quality of Service): Prioritize certain types of traffic (e.g., VoIP or video conferencing) to ensure smooth performance.
- Port Naming: Label ports in the management interface for easier identification (e.g., "PC-John," "Printer-Marketing").
Tips for Effective Network Management
- Cable Management: This cannot be stressed enough! Use color-coded cables, Velcro straps, and cable management panels in racks to keep your setup neat. This makes troubleshooting infinitely easier.
- Label Everything: Label both ends of your Ethernet cables, the ports on the switch, and the devices they connect to.
- Documentation: Keep a simple diagram or spreadsheet of your network layout, IP addresses, and switch configurations.
- Regular Monitoring: For managed switches, periodically check their status, port activity, and any error logs.
- Security: If your switch is managed, implement strong passwords and consider disabling unused management protocols.
- Environmental Control: Ensure your switch is in an environment with stable temperature and humidity to prolong its lifespan.
Setting up a network switch is a foundational step towards a more robust and organized office network. By choosing the right type and following these installation and management guidelines, you'll ensure your office's IT equipment communicates seamlessly, keeping your business running smoothly.