Elevate Your Workday: A Step-by-Step Guide to Installing Your Sit/Stand Desk
The modern office is undergoing a quiet revolution, and at its heart is the sit/stand desk. No longer a niche ergonomic accessory, these dynamic workstations are becoming a staple for anyone looking to combat the ill effects of prolonged sitting, boost energy, and enhance focus. But the thought of assembling one can seem daunting.
Fear not! Installing a sit/stand desk in your office is a straightforward process that, with a little patience and the right steps, can be accomplished by anyone. Get ready to transform your workspace and your workday!
Why Go Sit/Stand? The Game-Changing Benefits
Before we get to the wrenches and screws, let's quickly recap why this upgrade is worth it:
- Improved Health: Reduces risks associated with sedentary behavior (heart disease, diabetes, obesity).
- Increased Energy & Focus: Standing periodically can boost circulation and alertness, fighting the afternoon slump.
- Reduced Back Pain: Alleviates pressure on the spine compared to prolonged sitting.
- Enhanced Productivity: A more comfortable and dynamic workday often translates to better output.
What You'll Need (Tools & Prep)
Most sit/stand desks come with all the necessary hardware, but a few basic tools will make the job much easier:
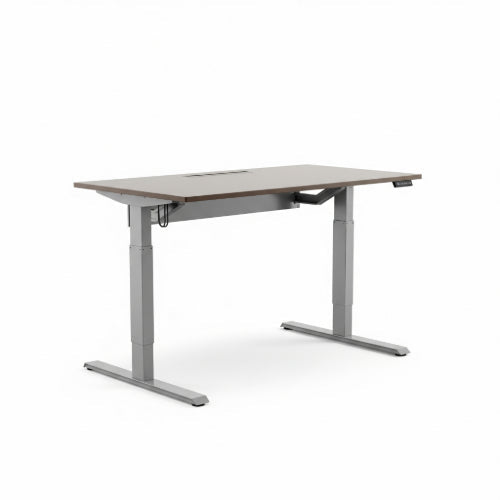
- The Sit/Stand Desk: This typically includes the tabletop, legs (with motors if electric), control panel, and all necessary screws/bolts.
- Phillips Head Screwdriver: Essential for most assemblies.
- Allen Keys/Hex Wrenches: Usually provided with the desk.
- Drill (Optional but Recommended): For pre-drilling pilot holes, especially if your tabletop isn't pre-drilled. Use a drill bit slightly smaller than your screws.
- Measuring Tape: For precise alignment.
- Level: To ensure your desk is perfectly even.
- Pencil: For marking screw locations.
- Flashlight or Headlamp (Optional): Helpful for seeing in tight spaces.
- A Helper (Highly Recommended for Large Desks): Especially for lifting the tabletop and flipping the assembled desk.
- Clear Workspace: Enough room to lay out components and assemble.
The Installation Process: Step-by-Step
While specific instructions vary slightly by manufacturer, the general steps remain consistent. Always refer to your desk's specific manual first.
Step 1: Unpack and Organize
- Clear the Area: Find a large, clean, and flat space, preferably where the desk will ultimately reside.
- Unpack Components: Carefully remove all parts from the packaging. Lay them out logically.
- Check Inventory: Cross-reference all parts against the included manual's parts list to ensure nothing is missing or damaged.
Step 2: Assemble the Desk Frame
- Attach Feet to Lifting Columns: The base of your desk typically consists of two lifting columns (the motorized parts) and two feet. Securely attach the feet to the bottom of each lifting column using the provided bolts.
-
Connect Crossbar/Support Beam: Most electric sit/stand desks have a central crossbar or support beam that connects the two lifting columns. Attach this beam to the top of each lifting column. This usually involves bolts and sometimes specific alignment notches.
- Pro Tip: Some crossbars are adjustable in length. If so, adjust it to the appropriate width for your tabletop before attaching the tabletop.
- Install End Brackets (if applicable): Some frames have additional brackets at the ends that connect to the tabletop. Attach these to the frame now.
Step 3: Attach the Control Box and Motors
- Mount the Control Box: Locate the main control box (the "brain" of your desk). It typically mounts to the underside of the crossbar or an end bracket using small screws.
- Connect Motor Cables: Plug the cables from each lifting column's motor into the corresponding ports on the control box. Ensure a secure connection.
- Connect Control Panel Cable: Plug the cable from the control panel (the up/down buttons) into the designated port on the control box.
Step 4: Secure the Tabletop to the Frame
Crucial Step: This is often where you need a helper for larger tabletops.
- Position the Tabletop: Place the tabletop upside down on your assembly surface (use a blanket or cardboard to protect its surface).
-
Align the Frame: Carefully place the assembled desk frame onto the underside of the tabletop. Center it both front-to-back and side-to-side.
- Pre-drilled Holes: If your tabletop has pre-drilled holes, align the frame's mounting plates with these holes.
- No Pre-drilled Holes: Use a pencil to mark the locations for the screws through the mounting plates of the frame. Crucially, pre-drill pilot holes at these marked spots. This prevents splitting the wood and makes screw insertion easier.
- Screw the Frame to the Tabletop: Using the provided screws, securely fasten the desk frame to the tabletop. Don't overtighten, but ensure they are snug.
Step 5: Cable Management
- Organize Cables: Neatly route all motor and control panel cables using the included cable clips, ties, or channels on the underside of the desk. This prevents snags and creates a clean look.
- Secure Power Cable: Run the main power cable from the control box.
Step 6: Flip and Test
- With a Helper: Carefully and slowly flip the assembled desk upright onto its feet. This is the most crucial step for avoiding damage or injury.
- Connect to Power: Plug the desk into a power outlet.
- Initial Calibration/Reset: Many electric desks require an initial calibration or reset procedure after being plugged in. This usually involves pressing and holding specific buttons on the control panel until the desk moves to its lowest point and then slightly up again. Refer to your manual for the exact procedure.
- Test Functionality: Operate the desk through its full range of motion (up and down) to ensure everything is working correctly.
Step 7: Final Touches & Setup
- Level the Desk: Use a level to ensure your desk is perfectly flat. Most feet have adjustable glides for minor adjustments.
- Personalize: Set up your monitors, keyboard, mouse, and other peripherals. Ensure your monitor arms are properly secured and that cables are managed to prevent tangles when the desk moves.
- Program Presets: If your desk has memory presets, program your ideal sitting and standing heights for quick transitions.
Enjoy Your New Ergonomic Workspace!
Installing a sit/stand desk is a significant upgrade to your office that pays dividends in health and productivity. Take your time, follow the instructions, and don't hesitate to consult your manual or even YouTube tutorials if you get stuck. Once it's assembled, you're ready to experience a more dynamic, comfortable, and energetic workday. Happy standing!